Deploy to a server installation
Usually you conveniently develop your study on your local computer where you have a local installation of JATOS. Then just use the export and import buttons in your installations to transfer the study to your JATOS server.
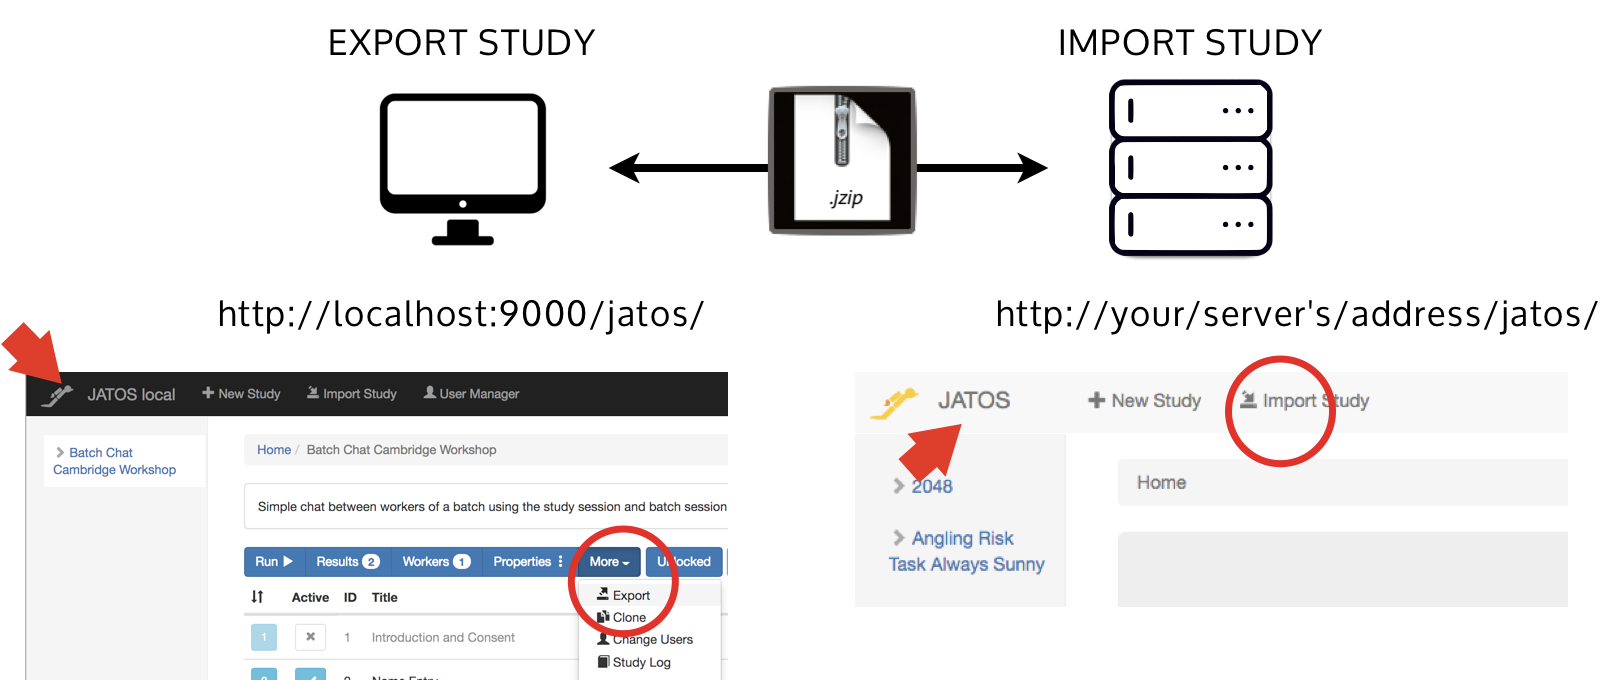
If you have a server already, you will need to take your ready-to-run study from your local installation and deploy it to the server. In order to do this:
- On your local JATOS installation, where your study is, click on the study you want to export on the left sidebar.
- On the Study bar, click Export. A pop-up window will appear. Save the .jzip file wherever you like on your computer.
- On your server installation, simply click Import.
Here's a little sketch of the same three steps above
Please note that:
- The two JATOS look almost identical, and you will (basically) only distinguish them on the basis of the URL in the browser. To prevent confusion, we've made it easier: A local JATOS installation has a black bar on top. A server installation has a light-grey bar.
- A .jzip file is a normal .zip file. We just changed the name to make this process clearer. (JATOS users got confused and often tried to unzip the file they had downloaded, add HTML files in it, and re-zip it. This will lead to all sorts of problems. Don't do this. You should do all modifications of files and study properties from the JATOS GUI.)
- In the process of exporting/importing you'll transfer all assets of your study (HTML/JS/CSS files, images, audio, etc) contained in the local study folder. You will not transfer result data.
- If you want to make changes to a study, we also recommend that you so in the local JATOS. There you have full access to the study assets and can change and edit them easily. Then again you can Export → Import to the JATOS server.